File
This section illustrates roles and uses of file-related menu items.
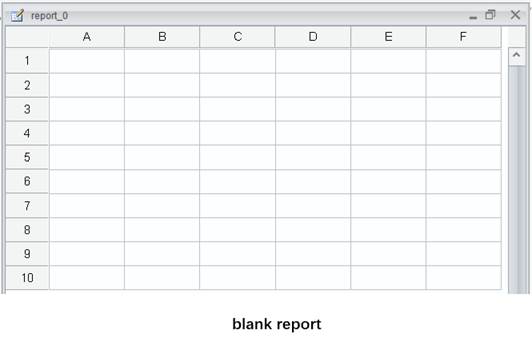
New report
The New report icon is used to create a new report file.
New report group
This item leads you through creating a new report group. A report group combines closely connected reports into a unit, and users can work on or process all reports at once as they handle a single report.
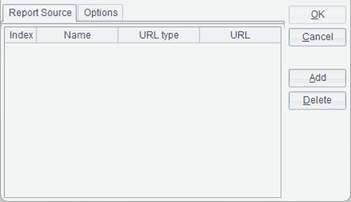
Click File -> New report group and the following Report source editor interface pops up:
First, add a report source for the report group. The concept of report source to a report group’s is like that of data set to a report.
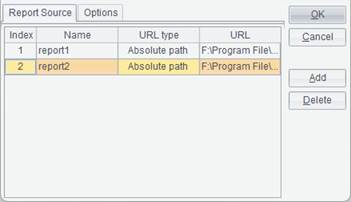
Click Add button to add a new report source and double-click the URL column to choose a report you want to add in the pop-up Open window. There are two types of URL – relative path and absolute path; a relative path is relative to the resource directory configured in Tools -> Options -> File. Note: Do not precede a relative path with the slash “/”.
For example, we add absolute paths of Orders table and Orderdetails table, as shown below:
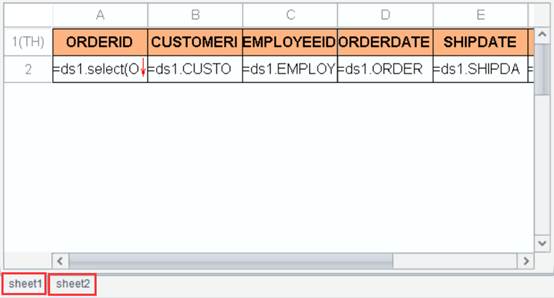
Click OK and Excel-like sheet tags appear on the designer interface. Click them and you can view reports in the report group, as shown below:
Open report
The Open report item is for opening an existing report file (*.rptx), template file (*.rptm), report preview result file (*.rptr) or report group file (*.rptg), or for opening an existing Excel file (*.xls / *.xlsx), editing it and saving it as a report file (*.rptx).
Click
File -> Open report or ![]() icon on the toolbar or
press Ctrl+O to pop up the Open dialog:
icon on the toolbar or
press Ctrl+O to pop up the Open dialog:

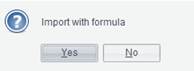
Select a file type, find the target file and click Open button to open the file on the designer. When trying to open an Excel file, you only get its first sheet and a pop-up box at the same time, as the following shows:

Click Yes to import formulas and No to only import values without formulas.
Quick open
You can open an existing report file using an URL or a file path through this menu item.
Click File -> Quick open or press Ctrl+Q to pop up the interface below:
In this editor, you can edit the path for opening a report file, and then click OK button to open the target file.
Open dataset
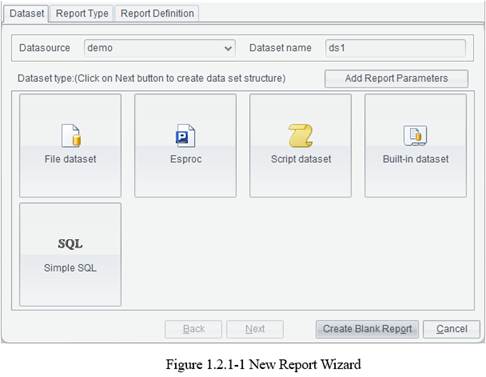
You can use this menu item to create a new empty report having a dataset source.
The concept of dataset:
A dataset is a two-dimensional view that acts as the report’s data source. A dataset can be obtained either through database SQL queries or from other heterogeneous data files.
Create a new data set during the process of making a report through File -> Open Dataset wizard. Four dataset types, including File, SQL, esProc and Clipboard, can be used to create the data set.
Dataset type:
File dataset
A file data set obtains data from a file, whose format can be txt, xls, xlsx, csv, btx (bin file) or ctx (composite table file).
When the source file is a bin file or a composite table file, they can feed data only from their base tables for the time being.
Below is the file dataset interface:
File: Name of a file specified by an absolute path or a relative path. No need to head a relative path with the slash “/”. A relative path is relative to the Resource directory configured in Tools -> Options -> File. The property corresponds to the path specified in <home> property in the configuration file raqsoftConfig.xml.
Sheet name: When the file type is Excel, the item lets you choose a worksheet on which you will work from the current Excel file.
Character set: The character set used by a text file or a CSV file. Two types of character set – GBK and UTF-8 – are supported.
Import the first row as titles:Choose whether or not import the first row of data in the file as column titles.
Reselect file when previewing:To preview a data set during data browsing or on the designer, you can select a different data set to preview through the pop-up Reselect dataset file dialog.
Delete quotation marks enclosing strings, including those in titles: Choose whether or not to delete the outermost quotation marks enclosing strings.
Separator:The separator used to separate fields of a text file. Types of delimiters include TAB, comma ( , ), space, pipe ( | ), hyphen ( - ) and underline ( _ ).
Note: A CSV file can only use comma as the separator.
Begin row/End row: When the file type is Excel, there are the two options on the interface. They are used to determine the number of rows to be selected from the Excel file.
Sometimes the source file is very large. The following option helps reduce the size of data set to be loaded and avoid memory overflow by not loading unwanted data into the memory.
Fields: Select certain fields in a file.
Filter: Perform the filter operation to get records meeting the specified condition. No parameters are allowed in the filtering condition. The filtering condition should meet the requirement of the Boolean expression; sue logical operators between multiple Boolean expressions, such as &&, ||.
● Example: Create a file data set based on orders.txt.
1. Click File -> Open dataset -> File to enter the following File dataset interface:
2. Click ![]() button to select orders.txt, or
enter path of the file. For example, if the Resource directory configured on
File tab in Tools -> Options is C:\raqsoft\reportlite\demo and
orders.txt is located in demo directory, just set the file as orders.txt.
button to select orders.txt, or
enter path of the file. For example, if the Resource directory configured on
File tab in Tools -> Options is C:\raqsoft\reportlite\demo and
orders.txt is located in demo directory, just set the file as orders.txt.
3. Select the character type corresponding to the file under Character set, which is by default GBK. Import the first row as titles is by default checked. Select Separator for separating fields, which is TAB by default. After these done, the File dataset interface is as follows:
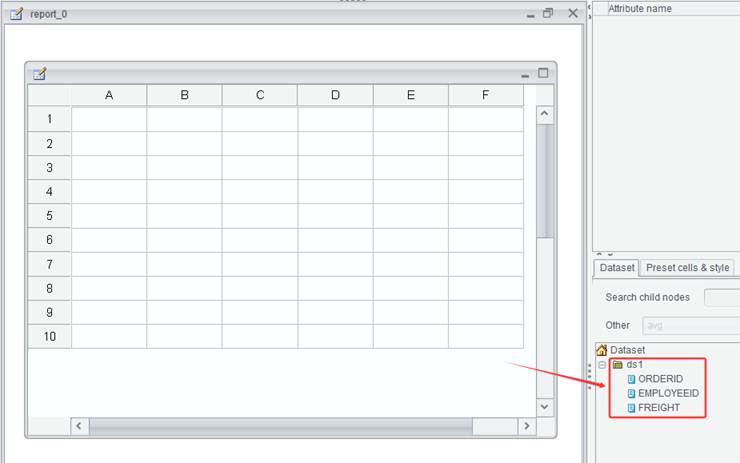
4. Select fields to be used and set the filtering condition.
Select ORDERID field, EMPLOYEEID field, FREIGHT field:
Set filtering condition: ORDERID < 10300
Click OK and an empty report having file dataset is created.
SQL query
The data forming a data set comes from the database. A SQL statement queries the database to get data meeting the specified condition and form the data set. This type of data set is created not through manually writing a SQL statement but through a graphical wizard that guides users to set a search condition and automatically generates a SQL statement. Such a data set is friendly to you if you are not familiar to writing SQL statements.
● Example: Create an empty report having a SQL query data set using ORDERS table and ORDERDETAILS table.
1. Click File -> Open dataset -> SQL to enter the SQL editor interface, as shown below:

2. Select Schema, and select data tables from Available table to Selected table through the arrows between them; or double-click a data table name to select.
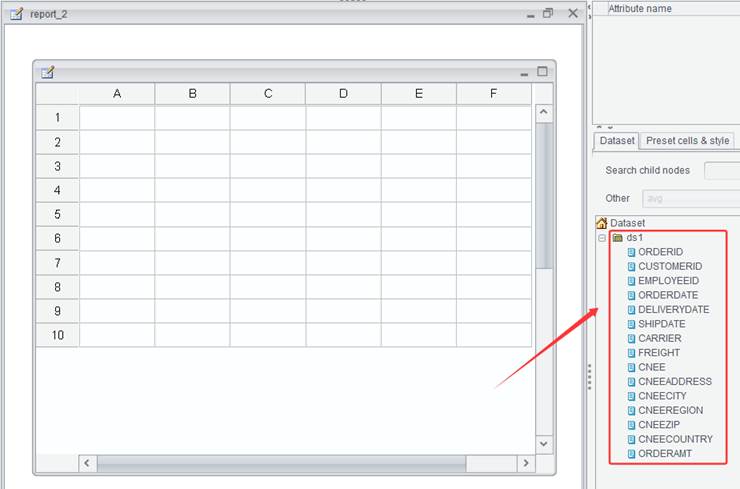
3. Switch to Field tab, where you select the target data table in the drop-down list and the table’s available fields are listed below, then you select fields from Available field to Selected field through the arrows between them or just double-click a field to select.

4. Switch to Computed column tab, where you select target fields to the Computed column edit box and enter an expression .
Example: ORDERDETAILS table has UNITPRICE field and NUMBER field. You need to directly get the product of the UNITPRICE value and NUMBER value from the table. To do this you can enter expression ORDERDETAILS.UNITPRICE * ORDERDETAILS.NUMBER as TotalAmt in the “Computed column” editing area, as shown below:

5. Switch to Where tab, where you select the target fields to Where edit box and enter the expression. Parameters can be used in a SQL statement, and according to the SQL syntax, a question mark should be entered to hold the position of a parameter.
For example: To retrieve order records where ORDERDATE is within a specified period of time from ORDERS table, write a search condition in the “Where” edit box – ORDERS.ORDERDATE > ? AND ORDERS.ORDERDATE < ?:

6. Switch to Order by tab, where you select fields on which records are sorted to the Order by box.
7. Switch to SQL tab, where you can view the edited SQL statement. In SQL, the position where a parameter is needed should be held by a question mark, such as the above search condition that uses two question marks, as shown below:

8. Switch to Parameter tab, where you enter parameter names or an expression containing parameters (without being headed by the equal sign) according to the order of question marks. You do not need to take care of data type of the parameters, which will be automatically determined during the execution. The settings are as follows:

Dataset config:Is used to control how many records to be retrieved to form a data set.
Begin row/End row: For manually controlling the number of rows in a data set. If the amount of data report needs is large, pass a parameter to change the beginning row and ending row. Generally, both are input parameters through which the beginning and ending row numbers are controlled. To implement this, it is meaningless to input a constant.
Count threshold:It takes very long to response when you try to generate a data set based on a large amount of data. Set a threshold (int), and when the number of records actually retrieved exceeds the threshold value the retrieval stops. The default threshold value is 0, which means there isn’t a number limit for the record retrieval.
Warning threshold:When this option is checked, get the number of to-be-retrieved records, check whether it exceeds the record count threshold or not, and, if not, generate the data set. When this option isn’t checked, directly generate the data set, terminate the retrieval if the record count exceeds the threshold during the process, and reset the data set.
Note:The record count threshold becomes invalid if a massive data set is involved.
9. Click OK button and an empty report having a SQL data set is created.
esProc
An esProc dataset obtains its data from an esProc file. The result of computing an esProc file can be returned through the return statement or without the statement (can be automatically returned without the return statement if the cell containing the last statement is an assignment cell), and used as the ReportLite data set.
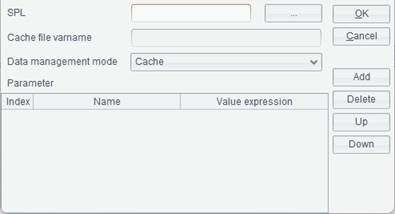
Below is the esProc dataset interface:
SPL: Click
![]() button after SPL and select an
esProc file (a file with extension .splx, .spl, or .dfx)
button after SPL and select an
esProc file (a file with extension .splx, .spl, or .dfx)
An esProc file path can be an absolute one or a relative one without being headed by slash “/”. The relative path is relative to the Search path configured in Tools -> Options -> esProc options. The property corresponds to splPath configured under <esProc> node in raqsoftConfig.xml.
Cache file varname: The Cache file varname corresponds to file buffer variable in the esProc file.
Data management mode: Cache and SPL self-management.
Cache – Data retrieval based on the cache file.
SPL self-management – Data retrieval through custom SPL query.
Parameter: If parameters are defined in an esProc file, their names will be automatically loaded in the parameter list. The parameter names in the list correspond to names of the defined parameters in the esProc file. The parameters can either receive single values or report parameters. With the latter, compute the parameter value using report expression syntax and pass it to esProc file as its parameter value.
Note:
When esProc data set is used for creating a big report and a custom buffer file needs to be defined in it, the “Cache file varname” should be set as buffer file variable configured in esProc.
● Example:
Below an esProc file:

1. Click File -> Open dataset -> esProc to enter esProc dataset interface, as shown below:
2. Click ![]() button after SPL and select an
esProc file:
button after SPL and select an
esProc file:
![]()
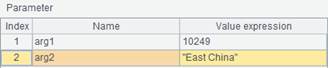
Parameters in the esProc file will be automatically loaded in the parameter list:
3. Click OK button to finish creating an empty report having the esProc dataset.
Find more uses of esProc data sets in esProc Tutorial.
●Note: The esProc file, as a dataset type, can automatically connect to the database if it uses the data source to which the report currently connects, and can directly sue the db.query() function. If its data source isn’t the one to which the report currently connects, the esProc file must first establish the data connection via connect("db") function, then performs the query, and finally closes the connection using the close() function.
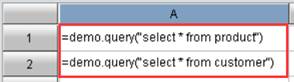
For example, the SPL file below shares the same data source with the ReportLite. So, it directly uses db.query() to perform the query:
Clipboard dataset
A clipboard dataset is created by pasting data from the clipboard. The data typically originates from external data files such as Excel or Text. Both the structure and content of the dataset are stored within the report template, so when the report is computed, there is no need to retrieve data from the original data source.
Below is the clipboard dataset interface:
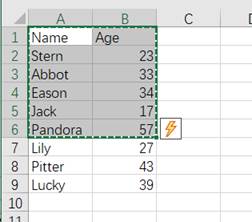
● Example: Paste a data set consisting of Name field and Age field coming from the clipboard.
1. Copy existing data in an Excel file to the clipboard.
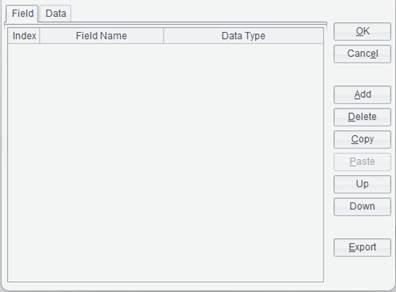
2. Click File -> Open dataset -> Clipboard, check Is the first line of data a header to enter the data set editing interface, where you can view data pasted from the clipboard. By checking Is the first line of data a header, field names will be automatically displayed on Field tab. You can also define custom fields for the data set. Click Add button on the right of the interface to add a field definition in the field list on the left, modify field name and field type if needed. Here two fields – Name and Age – are defined:
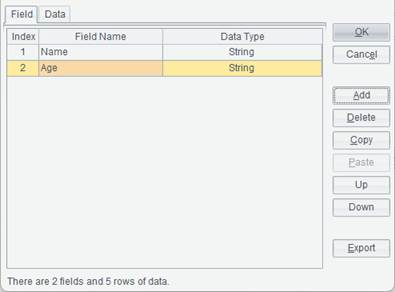
3. Switch to Data tab, where you can view data pasted from the clipboard. Click Add button to add data values for each field.
4. Click OK button and the data set is created:
Close
By clicking this menu item, you can close the current file on the report designer.
Click File ->
Close or icon ![]() at the top right corner, or press Ctrl+W
or Ctrl+F4 to close the current file on the
report designer.
at the top right corner, or press Ctrl+W
or Ctrl+F4 to close the current file on the
report designer.
Close all
By clicking this menu item, you can close all files opened on the report designer.
Click File -> Close all to close all files opened on the report designer.
Save
You can save a newly created or modified report file or report group file through this menu item.
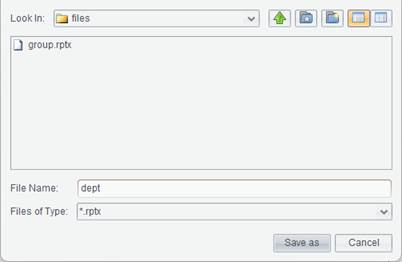
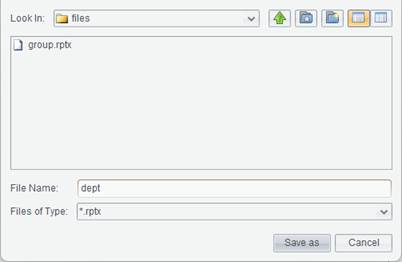
For a newly created
report, click File -> Save or icon ![]() on the toolbar, or press Ctrl+S to
pop up Save as dialog,
where you select a location where the report will be saved, and edit the report
file name. Then click Save as button
to save the report, as shown below:
on the toolbar, or press Ctrl+S to
pop up Save as dialog,
where you select a location where the report will be saved, and edit the report
file name. Then click Save as button
to save the report, as shown below:
For a modified
report, click File -> Save or icon ![]() on the toolbar, or press Ctrl+S to
save the modification.
on the toolbar, or press Ctrl+S to
save the modification.
Save as
This menu item lets you save the current report file or report group file in a different name or location, or save the report preview result file.
Click File -> Save as and in the pop-up Save as dialog, select a location for saving the current file and edit the file name. Then click Save as button to save file.
Preview
This menu item lets you preview the data presentation effect of a report.
Click
File -> Preview or icon ![]() , or press F9 to preview the effect of a finished report.
, or press F9 to preview the effect of a finished report.
Export
Through this series of menu items, you can export certain report data to Excel, Word, PDF, Text, XML and HTML, and then perform operations on the result file.
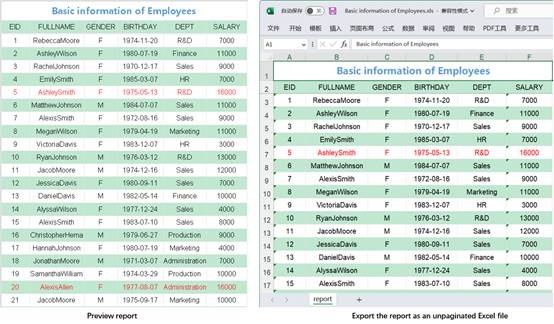
Export a report as an unpaginated Excel file.
Under the preview status, click File -> Export -> Excel file to get into the Open dialog, where you select a location for saving the target Excel file and enter a file name, as figure 1.2.10.1-1 shows:
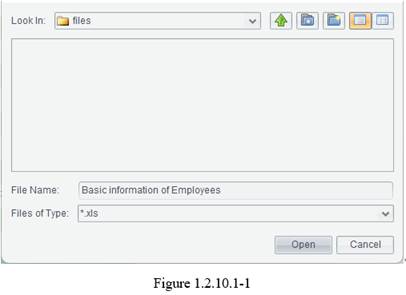
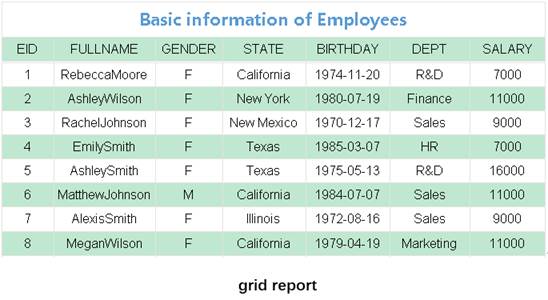
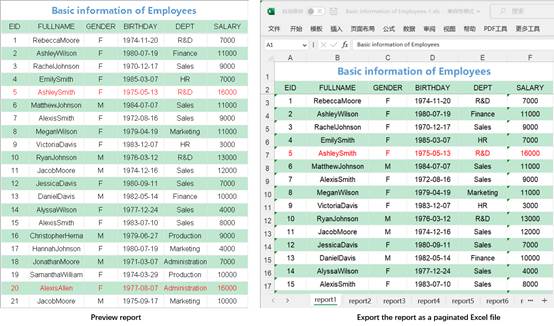
Click Open button to export information of the report under preview to an unpaginated Excel file. By exporting a report displaying employee information to an Excel file, the export effect is as follows:
Paginated excel
This menu item lets you export a report to a paginated Excel file.
Under the preview status, click File -> Export -> Paginated excel to get into the Open dialog, where you select a location for saving the target Excel file and enter a file name. As figure 1.2.10.1-1 shows, click Open button to export information of the report under preview to a paginated Excel file.
By exporting a report displaying employee information to a paginated Excel file, the export effect is as follows:
Excel with formula
This menu item lets you export a report to an Excel file with formulas.
Under the preview status, click File -> Export -> Excel with formula to get into the Open dialog, where you select a location for saving the target Excel file and enter a file name. As figure 1.2.10.1-1 shows, click Open button to export information of the report under preview to an Excel file with formulas.
●Under this menu item, formulas that Excel does not support cannot be exported and pagination isn’t supported.
This menu item lets you export a report to a Word file.
Under the preview status, click File -> Export -> Word file to get into the Open dialog, where you select a location for saving the target Word file and enter a file name and its extension. As figure 1.2.10.2-1 shows, click Open button to export information of the report under preview to a Word file.
This menu item lets you export a report to an unpaginated PDF file.
Under the preview status, click File -> Export -> PDF file to get into the Open dialog, where you select a location for saving the target PDF file and enter a file name. As figure 1.2.10.3-1 shows, click Open button to export information of the report under preview to a PDF file.
By exporting a report displaying employee information to an unpaginated PDF file, the export effect is as follows:
Paginated pdf
This menu item lets you export a report to a paginated PDF file.
Under the preview status, click File -> Export -> Paginated pdf to get into the Open dialog, where you select a location for saving the target PDF file and enter a file name. As figure 1.2.10.3-1 shows, click Open button to export information of the report under preview to a paginated PDF file.
By exporting a report displaying employee information to a paginated PDF file, the export effect is as follows:

This menu item lets you export a report to a text file.
Under the preview status, click File -> Export -> Text file to get into the Open dialog, where you select a location for saving the target text file and enter a file name. As figure 1.2.10.4-1 shows:

Click Open button to pop up the following Export-to-text options dialog:
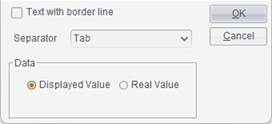
If you want to export a text file showing gridlines in the background, check Text with border line option. By doing this, the Separator drop-down list and Data box turn gray.
For an exported text file without showing gridlines, select in the Separator drop-down list the separator for separating cells in the report file, and the exported text file will use the selected separator. The available separators are Tab, Comma, Semicolon, Hash and Asterisk. In Data box, select whether you want to show Displayed Value or Real Value for the exported data. Then click OK button to export information of the report under preview to a text file format.
This menu item lets you export a report as an .html file format.
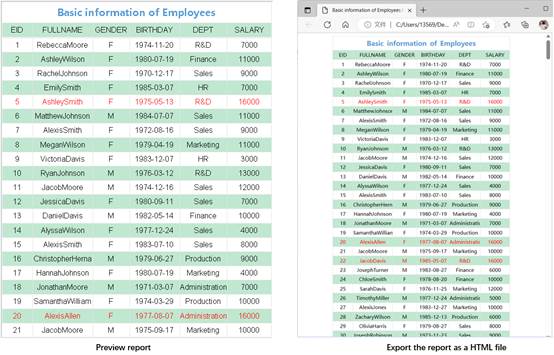
Under the preview status, click File -> Export -> Html file to get into the Open dialog, where you select a location for saving the target HTML file and enter a file name. As figure 1.2.10.5-1 shows, click Open button to export information of the report under preview to an HTML file.
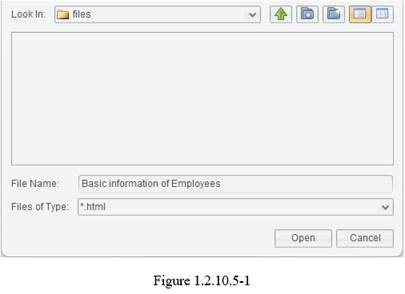
By exporting a report displaying employee information to an HTML file, the export effect is as follows:
This menu item lets you export a report as an XML file.
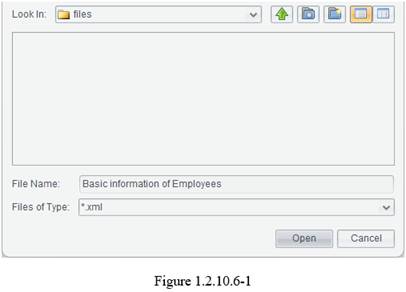
Under the preview status, click File -> Export -> Xml file to get into the Open dialog, where you select a location for saving the target XML file and enter a file name. As figure 1.2.10.6-1 shows, click Open button to export information of the report under preview to an XML file.
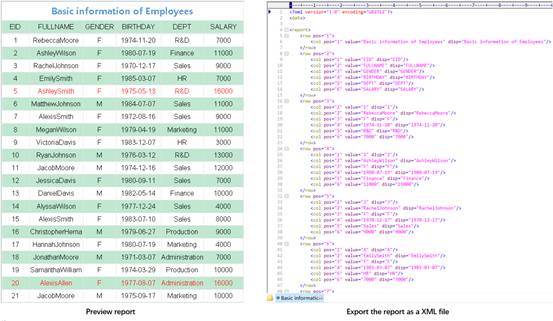
By exporting a report displaying employee information to an XML file, the export effect is as follows:
Office2007
Items on this menu are used to export reports as office2007 Excel file format. Refer related details in Excel file, Paginated excel and Excel with formula items.
Template
This series of menu items helps store reports having certain same qualities as built-in templates. We can create new reports based on these built-in templates. This can greatly reduce workload of repeatedly making reports. By default, there isn’t the Template item under File menu on the designer.
Click Tools -> Options -> General, check Template menu option and click OK button. Then restart designer and you can find Template on File menu.
Save as template
Through this item we can add the currently edited report file to the template library, where a template file’s extension is .rptm. Later we can create new reports based on the existing templates.
Open a finished report file (.rptx) and click File -> Template -> Save as template to get the interface below:
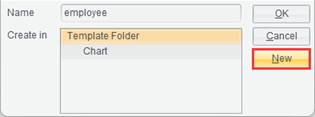
Select a folder in the tree-structure Create in box and click New button on the right to create a subfolder under the selected folder.
Select a folder in the tree-structure Create in box, enter a template name in Name edit box and click OK button to save the newly-created template file (.rptm) in the selected folder.
Sort template
You can sort out template files and name relative folders and files through this item.
Click File-> Template -> Sort template to open the folder holding template files and sort out them.
Create Reports Using Templates
This item lets you create a new report using an existing template.
Click File -> Template and select a desired template and open it. Then you can make a report based on this template and save the finished report as a .rptx file.
Recent files
By clicking this item, we can check report files recently opened.
Click File -> Recent files and then a desired report file to directly open it. If your target report is recently opened, just open it through Recent files without accessing it through File -> Open.
Recent connections
Through this item, you can check the recently connected data sources.
Click File-> Recent connections and select the desired data source to connect it. If your target data source is recently connected, just connect it through Recent connections without connecting it through Tools -> Datasource.
Exit
You can close the report designer through the Exit item.
Click File -> Exit or icon ![]() at the top right corner on the designer to close the report designer.
at the top right corner on the designer to close the report designer.